TOPICS
How to use the automatic data sync
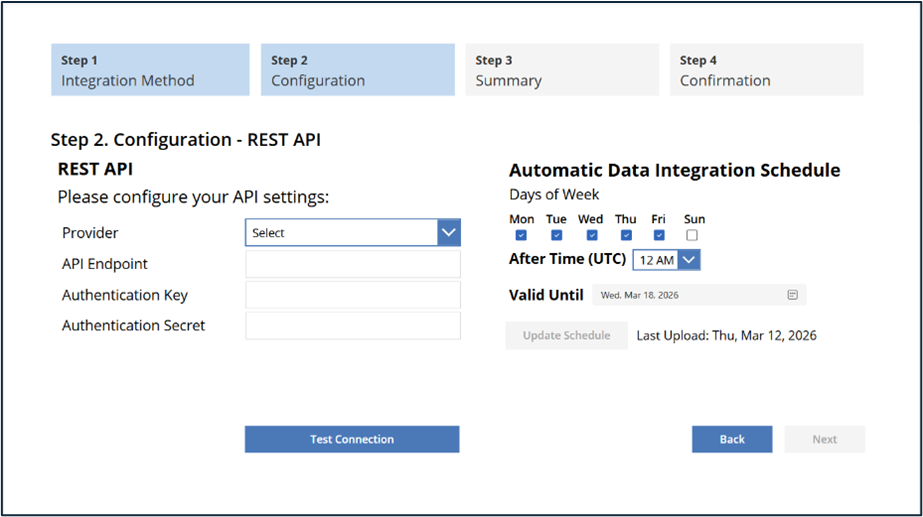
Once your initial data sync is approved, you can configure a schedule for automatic data updates directly within the REST API integration screen. This automated sync ensures student data remains current and aligned with your SIS, supporting accurate test planning and administration.
Set up a Sync Schedule
- Navigate to Data Integration > Rostering > REST API within the MGI application.
- Select the days of the week you wish the sync to occur (Sunday through Friday).
- Choose a time window for the sync. Syncs must be scheduled between 8:00 PM and 5:00 AM UTC to avoid peak usage hours.
- Set an expiration date for the schedule—up to 60 days from the first sync.
- Click Update Schedule to save your settings.
Once submitted, you will receive a confirmation that the schedule has been successfully created.
- Verify that your API credentials (Client ID, Client Secret, Endpoint) are accurate.
- Run a Test Connection to confirm successful integration.
- Retry the schedule setup after resolving any connection issues.
Viewing or Managing your Sync Schedule
After your sync schedule is created, return to the same setup page at any time to view or manage it. From this page, you can view your current schedule, expiration date (valid until), date of the last successful sync, and update the schedule if needed.
If you are experiencing problems, please contact Customer Service at [email protected]