TOPICS
Using the MGI
Welcome to the MHS Group Insights app, also known as the MGI. You can use this app to set up users, manage students, track completion of tests, generate reports, and bulk upload your data.
The home page
To get started, sign in to the MGI by entering your username and password. You’re then taken to the home page, where you can view your announcements and access the Naglieri General Ability Tests Technical manual.

Navigation
On the left side of the home page is the navigation pane. Hover your pointer over each icon for more information. The icons connect to the following pages:
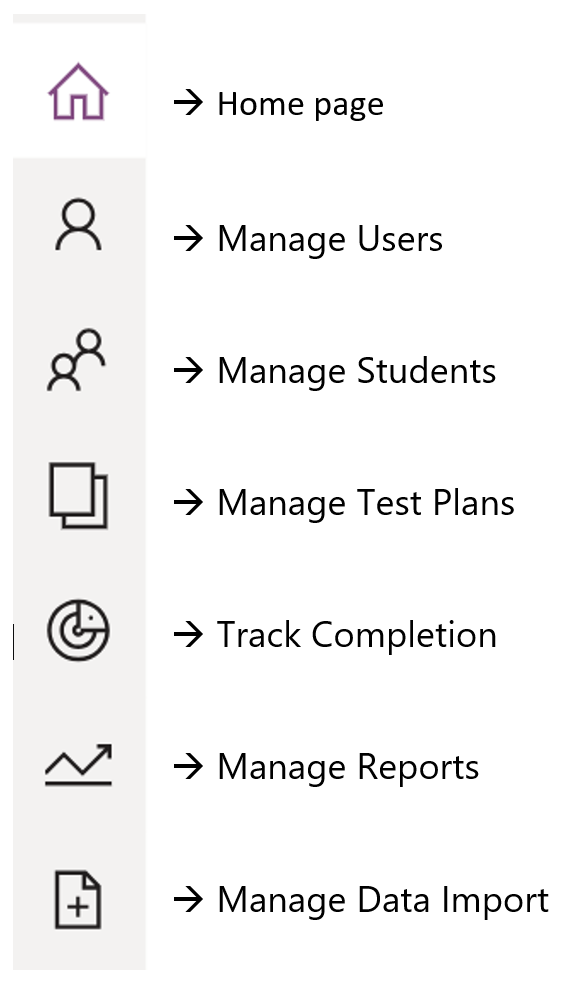
Note that these pages contain different features which you may or may not use based on your permissions and your role in gifted testing.
Manage Users
The Manage Users page is where you can create, edit, and manage the users that you want to have access to the MGI.

One of the main uses of this page is to assign permissions to the users. For example, you may want users to have access to all the features of the MGI or just some features, such as managing users or generating reports.

Manage Students
Click the Manage Students icon to view the Manage Students page. Here, you’ll see a list of the students who are going to be administered tests. You can filter the list based on the students’ school, class, and district.
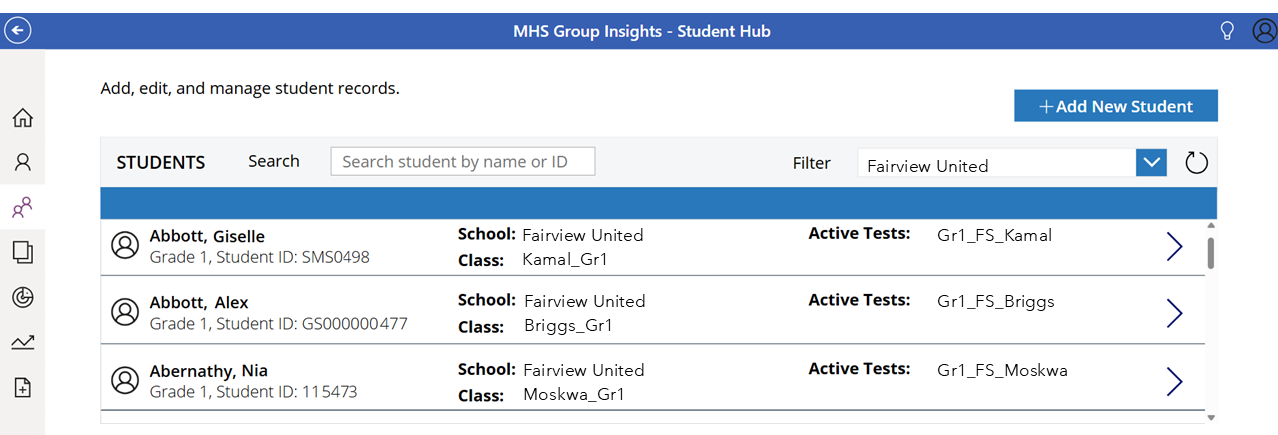
Use the Manage Students page to add new students and edit existing students. You can also create a bulk upload which uses an Excel template to upload multiple students at once.
Please note that if you want to edit large numbers of students at the same time, you’ll need to contact MHS.
Manage Test Plans
The Manage Test Plans page is where you can view and set up test plans for the students. These test plans are important because they contain a list of students for a given test session.

Go to the Manage Test Plans page when you want to assign the tests that students will take. When you assign these test, you’ll receive a document with the student access codes.
Track Test Completion
The Track Test Completion page is where you can monitor when a student has completed a test. The page also provides you with the total amount of verbal, nonverbal, and quantitative tests that have been completed.

You can filter the table based on the school or test type, as well as search for individual students.
Manage Reports
The Manage Reports page is where you can access the reports that you’ve generated.
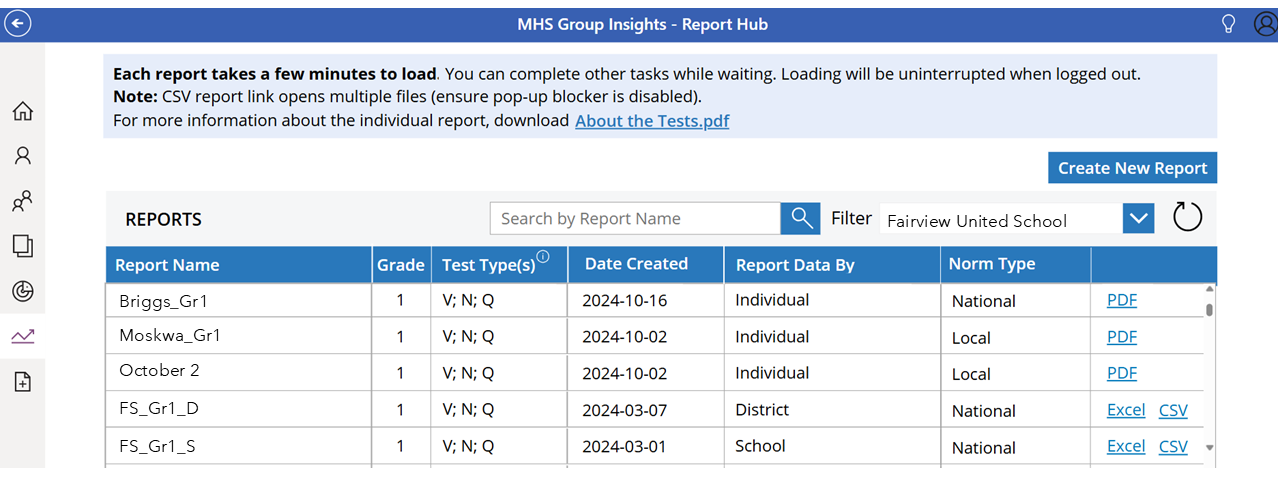
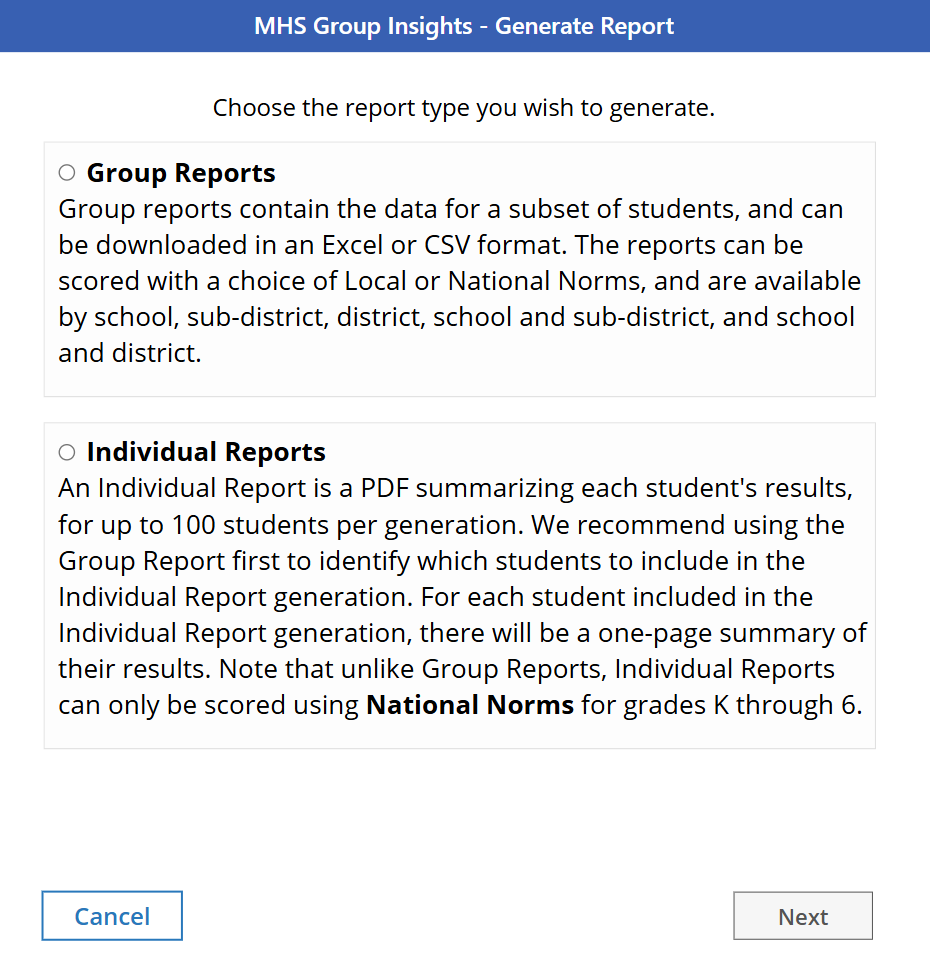
You can also create a new report by clicking +New Report, and then selecting the norm types, grade, testing period, and tests that you want to see in that report.
After you have generated a report, you can click the links to download the report as an Excel file (which we recommend), as a series of CSV files, or, for an Individual report, as a PDF. Please note that you’ll need to have pop-up blockers disabled on your browser if you want to download the CSV files.
Data Upload
Students must be integrated into the MGI before they can be added to a test plan. The quickest and most secure method to integrate students is to import school district data from your district’s School Information System.
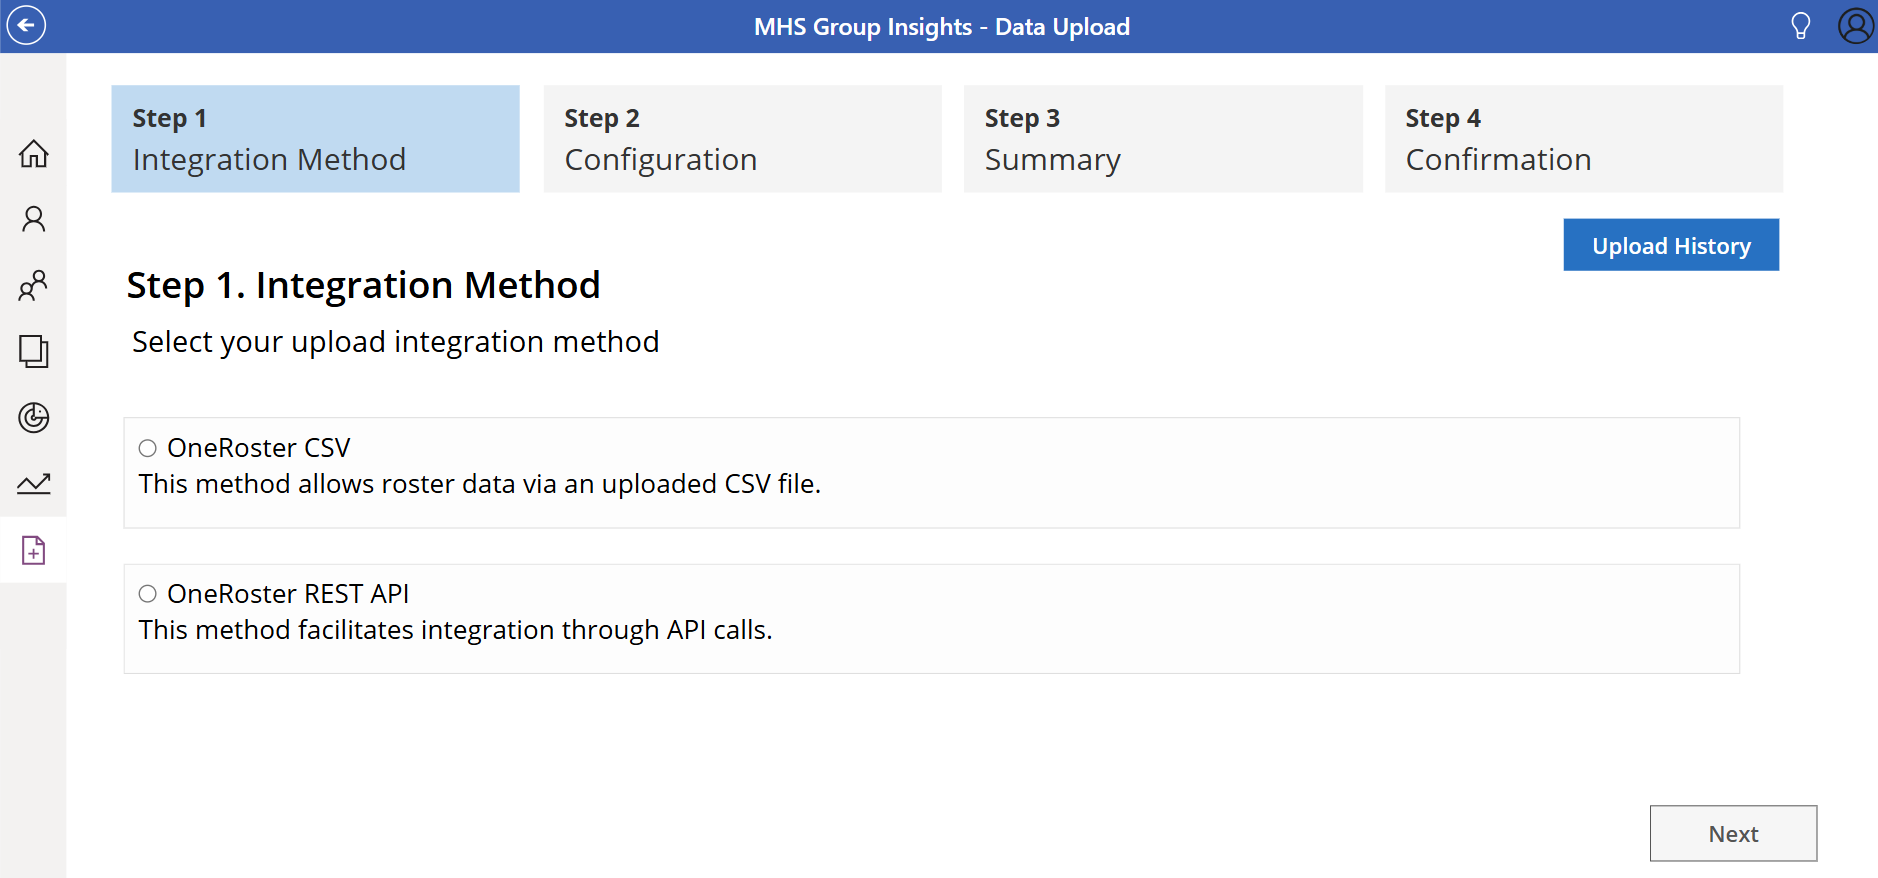
There are currently two integration methods to import roster data for your district: OneRoster CSV (which allows roster data to be uploaded to MGI via CSV files), and OneRoster REST API (which facilitates integration through API calls).
Please note that when data is imported through these methods, all of the data from the district will be integrated into the MGI, including teachers, classes, and students.