TOPICS
How to configure the ClassLink Single Sign-On
This guide provides step-by-step instructions for configuring ClassLink Single Sign-On (SSO) to enable secure access to the MHS Group Insights (MGI) application. By integrating ClassLink, districts can streamline administrator login using their existing credentials, simplify application assignment, and ensure accurate authentication across multiple platforms. The setup process includes adding and assigning the app in ClassLink, retrieving the client ID, and activating the application within the MGI platform.
Step-by-Step Instructions
- Sign in to Your ClassLink District Administrator Account
- Go to the ClassLink Login Page.
- Log in and navigate to the Management Console.
- Add the MHS Student Application
- From the left-hand menu, go to Applications → Add & Assign Apps.
- Use the search bar to find MHS Student App.
- Click Add to download the app directly to your Launchpad.
- Assign the Application to Users
- Locate the newly added application.
- Click the Assign button.
- Click Add for the users or groups you want to give access to the application.
- The MHS Student App will now appear in your Launchpad – continue the setup by
completing Step 4 to configure the integration.

- Configure the MHS Group Insights (MGI) Application
- While you're in your District Admin Portal, locate your Tenant ID—a 3–4 digit number unique
to your district.
- If you can’t find it, please contact your assigned Lead Implementation Specialist (LIS) for assistance.
- Once you have your Tenant ID, log in to the MGI application.
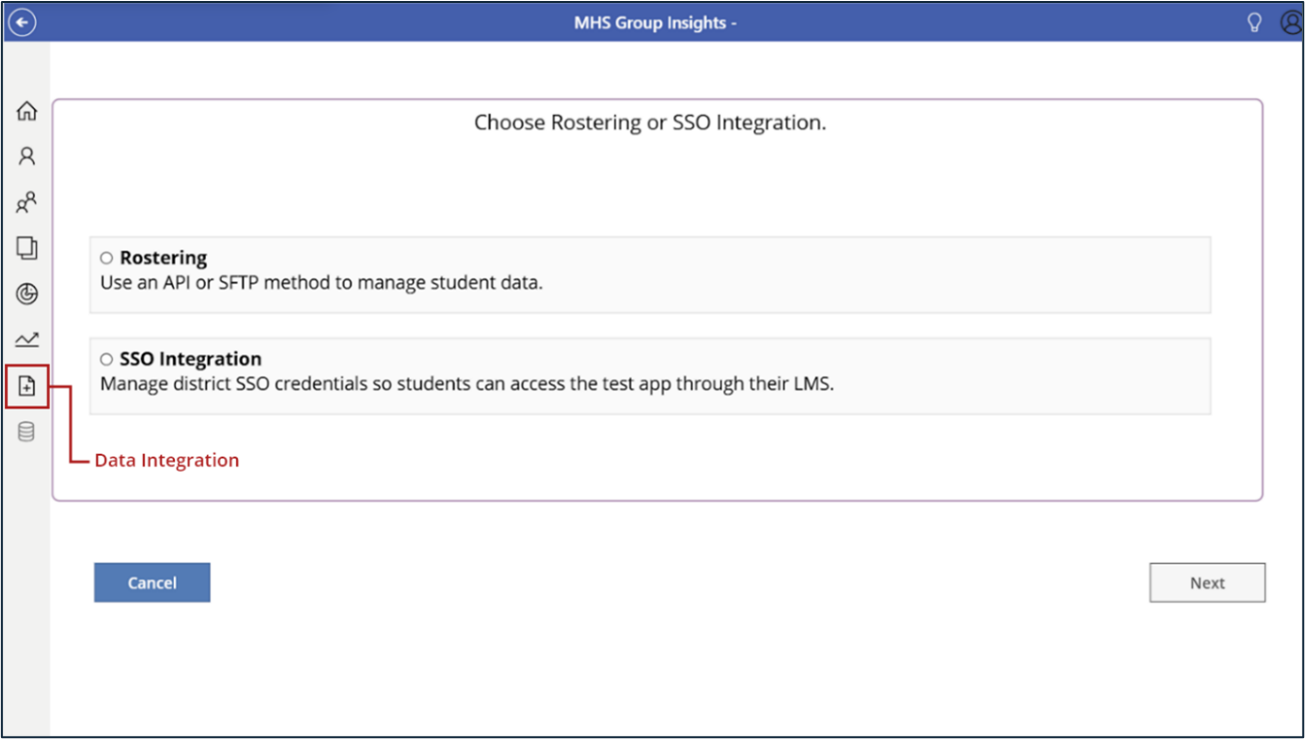
- From the sidebar menu, click the icon that opens the Data Integration screen. (Refer to the screenshot below to identify the icon).
- On the Integration Settings screen, you’ll be prompted to choose between Rostering and SSO Integration.
- Select SSO Integration, then click Next to proceed with the setup.
- While you're in your District Admin Portal, locate your Tenant ID—a 3–4 digit number unique
to your district.
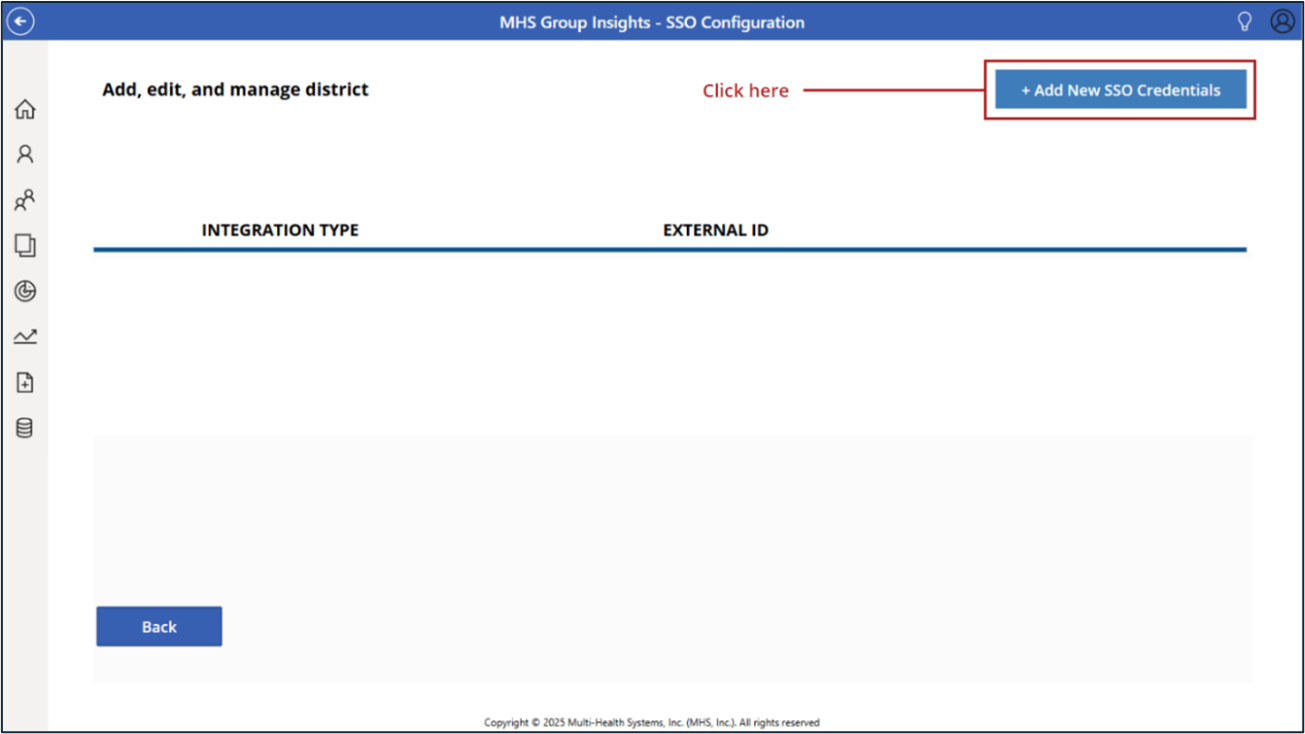
- Add ClassLink SSO Credentials
- In the next window, click +Add New SSO Credentials.
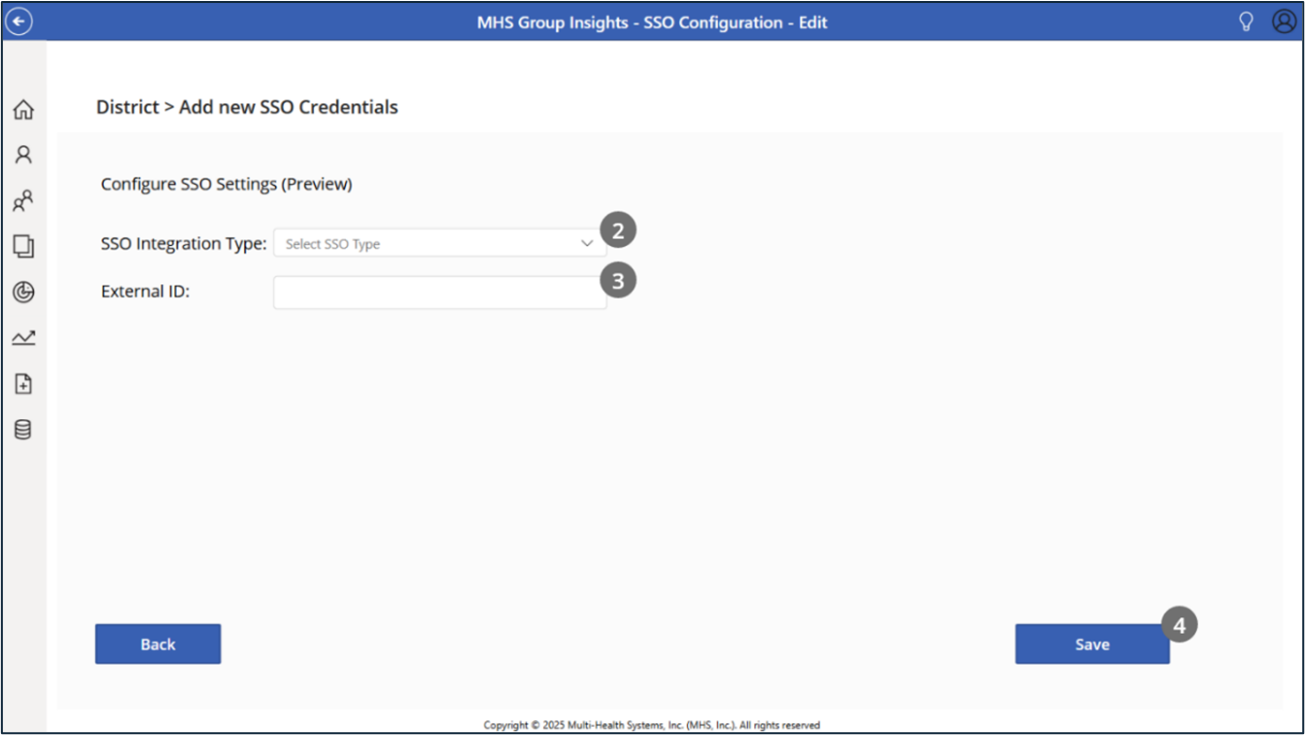
- Set the Integration Type to ClassLink.
- Paste the Tenant ID into the External ID field.
- Click Save to complete the setup.

- In the next window, click +Add New SSO Credentials.
- Final Verification
- Return to the ClassLink Launchpad.
Your new SSO application should now be active and ready for student access.
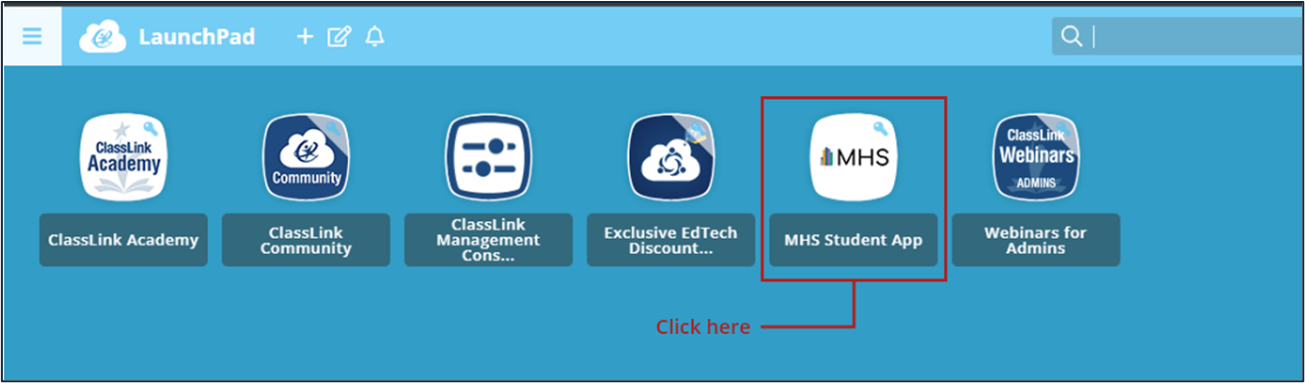
- Return to the ClassLink Launchpad.
Important: For students to successfully access their test through SSO, student emails must be included during rostering and a Test Plan must be created.
If either is missing, students will receive an error when attempting to log in.
Troubleshooting
If you experience issues during setup, double-check the following:
- The Web Address is correctly entered when adding the application
- The correct Tenant ID was entered in the External ID field
- ClassLink credentials were added properly in the MGI application
- Users have been assigned to the application
If you are experiencing problems, please contact the Implementation Team at [email protected]