TOPICS
How to configure the Canvas Single Sign-On
This guide provides step-by-step instructions for configuring Canvas Single Sign-On (SSO) using the LTI 1.3 standard to enable secure access to the MHS Group Insights (MGI) application. By integrating with Canvas, districts can streamline educator and student login using existing credentials, simplify app deployment, and ensure accurate authentication across multiple classrooms. The setup process includes configuring a developer key, installing the MGI app, and activating the connection within the MGI platform.
Step-by-Step Instructions
- Sign in to Your Canvas Admin Account
- Navigate to your Canvas Admin Dashboard.
- In the left-hand menu, go to Admin → Your Admin Account →
Developer Keys.

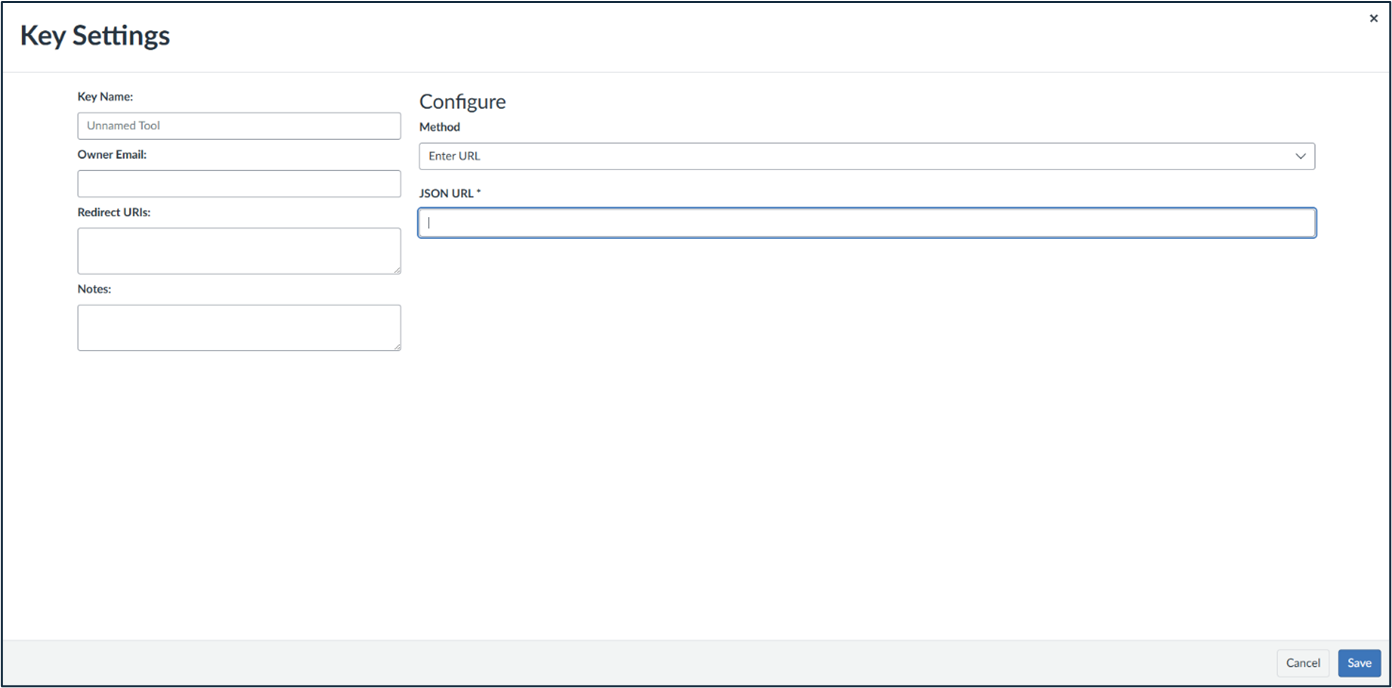
- Create a New LTI Developer Key
- Click the + Developer Key button.
- Select + LTI Key as the key type.
- In the form that appears, set the method to Enter URL.
- In the JSON URL field, paste the URL provided to you by the Lead Implementation Specialist assigned to you. If you have not received this information, please contact them directly for assistance.
- Click Save to proceed.
- Activate the Developer Key
- On the Developer Keys list, locate the newly added key.
- Flip the State switch to green to activate it.
- Copy the Developer Key shown in the Details column.

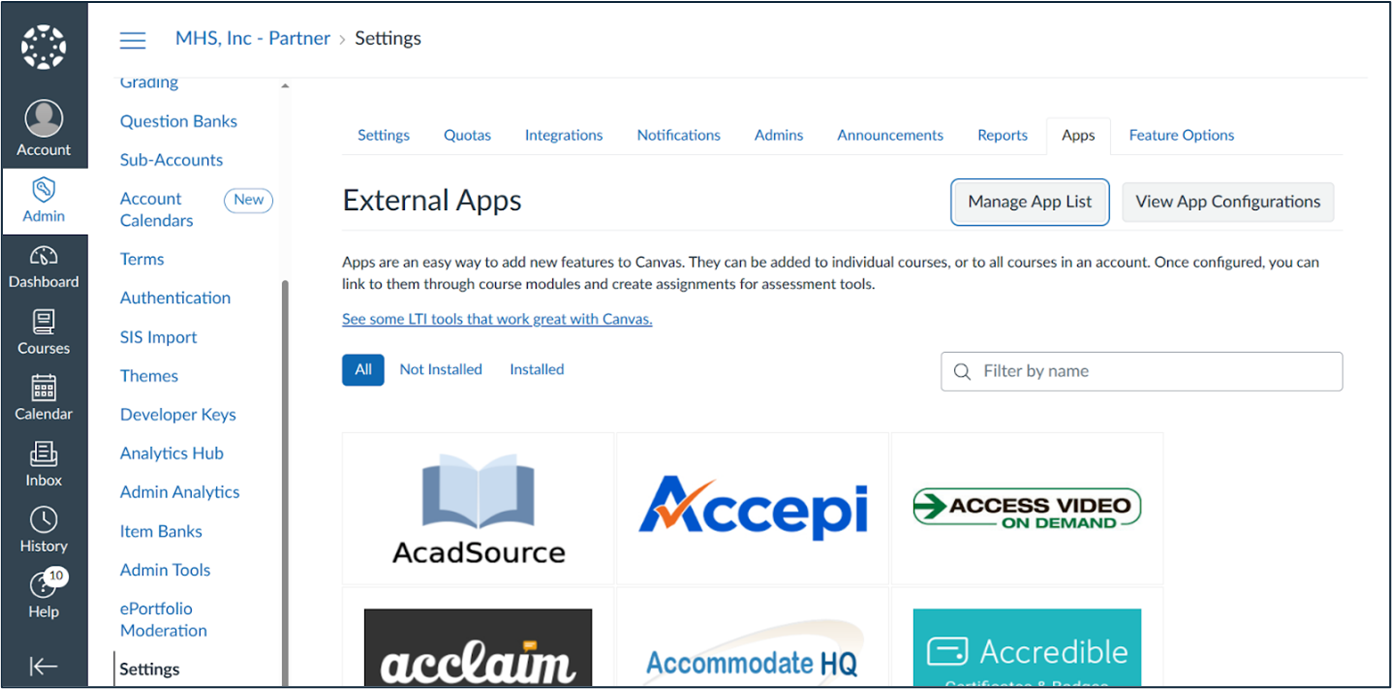
- Install the MHS App
- Go to Admin → Your Admin Account → Settings →
Apps.
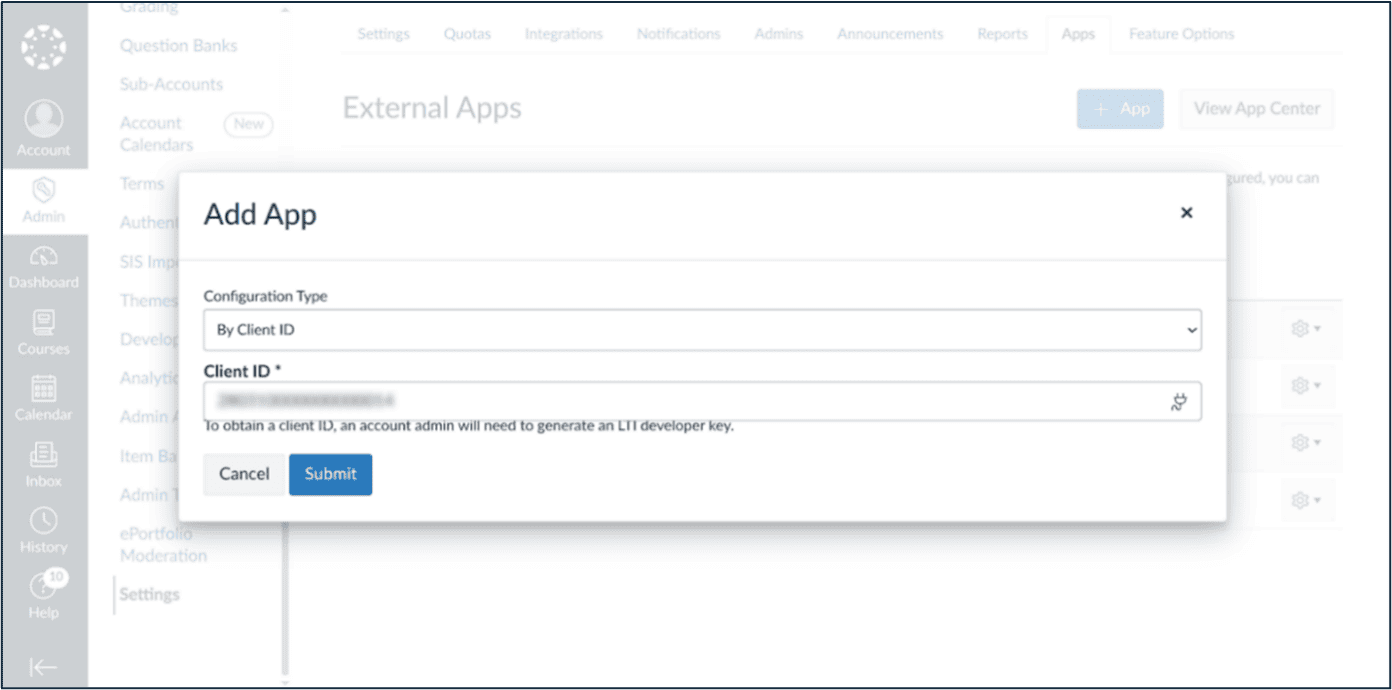
- View App Configurations, then click + App.
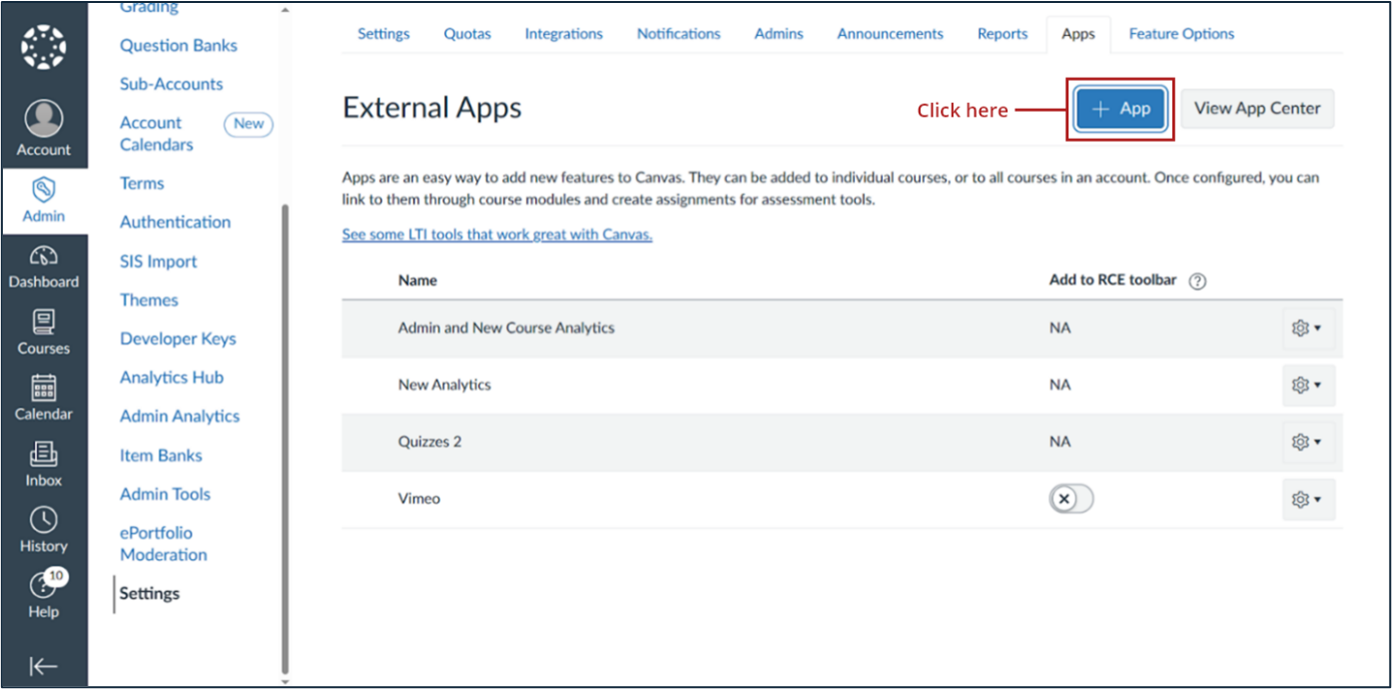
- In the new app form, set Configuration Type to by Client ID.
- Paste the copied Client ID into the appropriate field.
- Click Submit and then Install.
- Go to Admin → Your Admin Account → Settings →
Apps.
- Retrieve Deployment ID
- Once installed, open the App’s Settings.
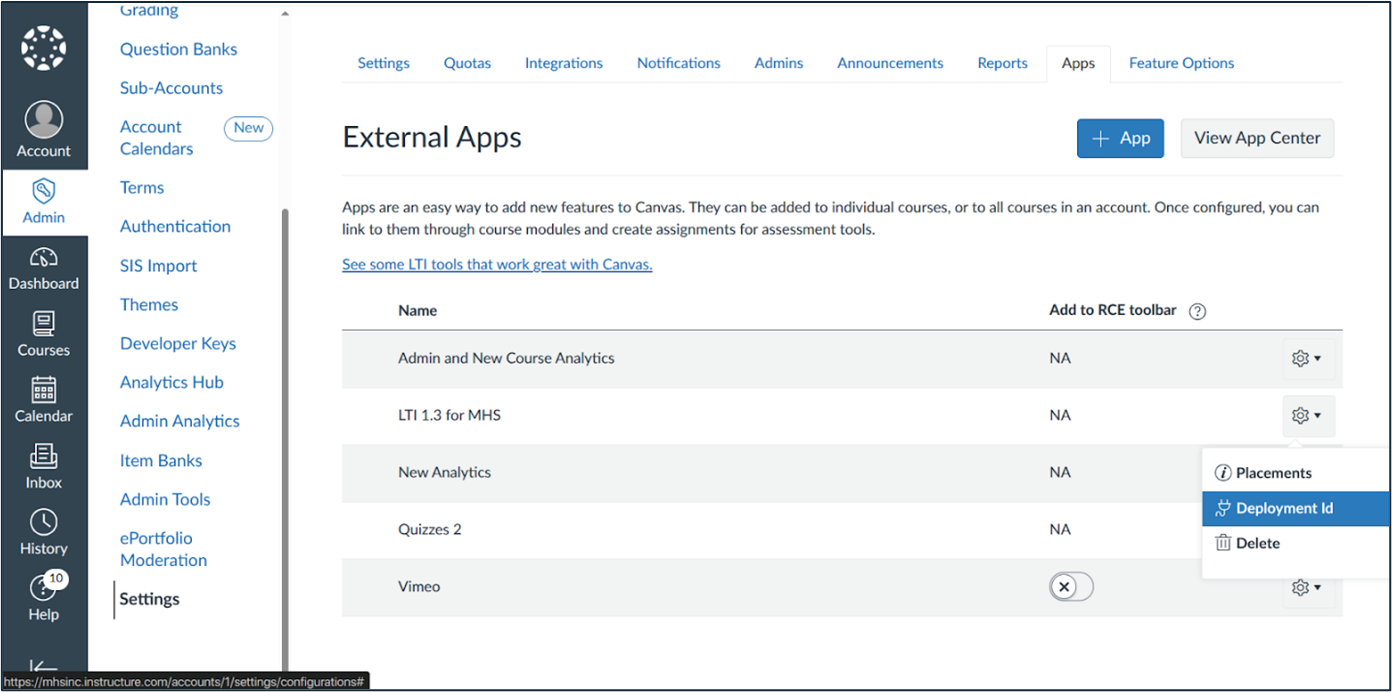
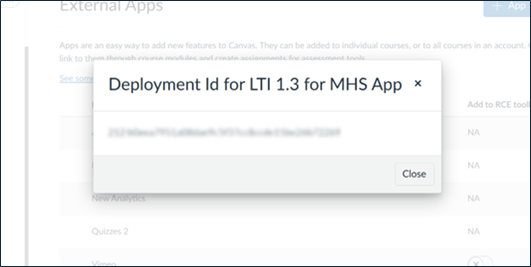
- Click Deployment ID.
- Copy the Deployment ID value—this value will be used in the MGI setup.
- Once installed, open the App’s Settings.
- Configure the MHS Group Insights (MGI) Application
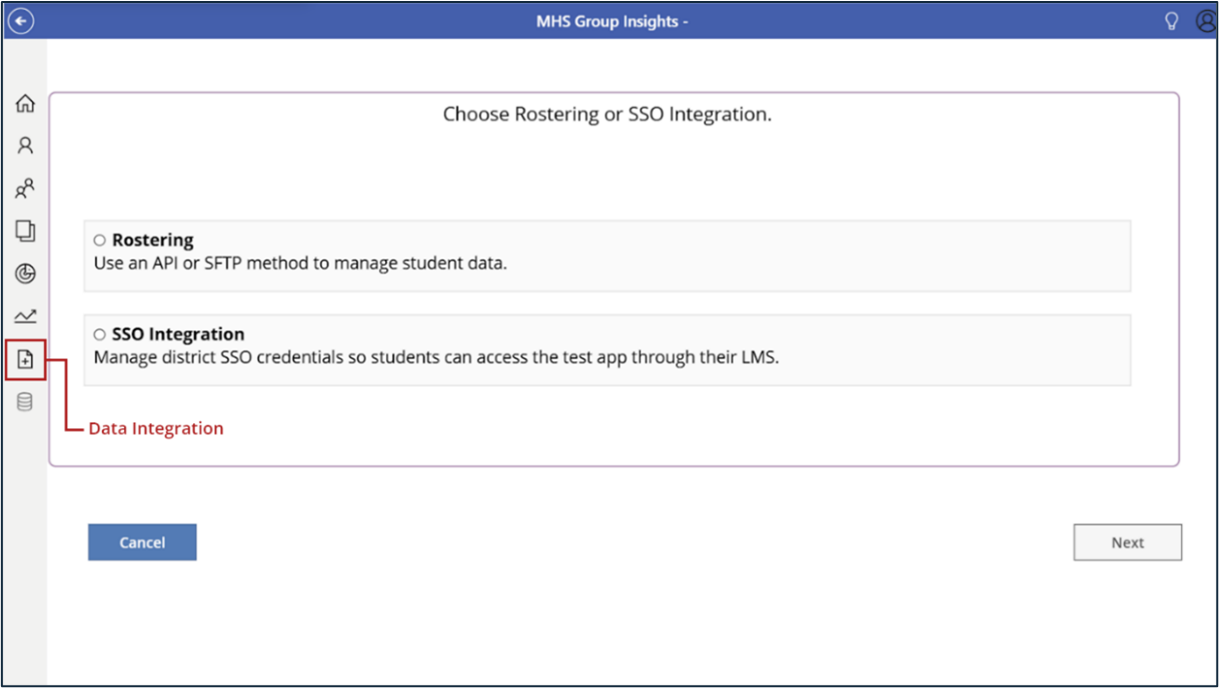
- Log in to the MGI application.
- From the sidebar menu, click the icon that opens the Integration Settings page. (Refer to the screenshot below to identify the icon).
- On the Integration Settings screen, you’ll be prompted to choose between Rostering and SSO Integration.
- Select SSO Integration, then click Next to proceed with the setup.
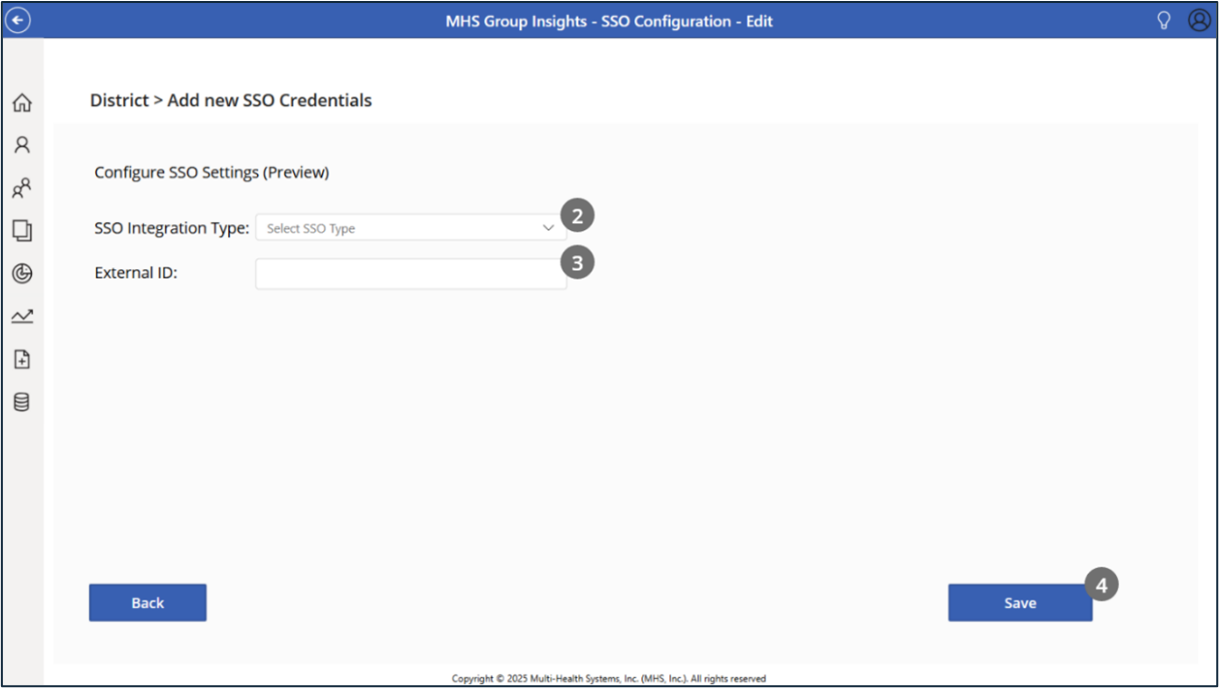
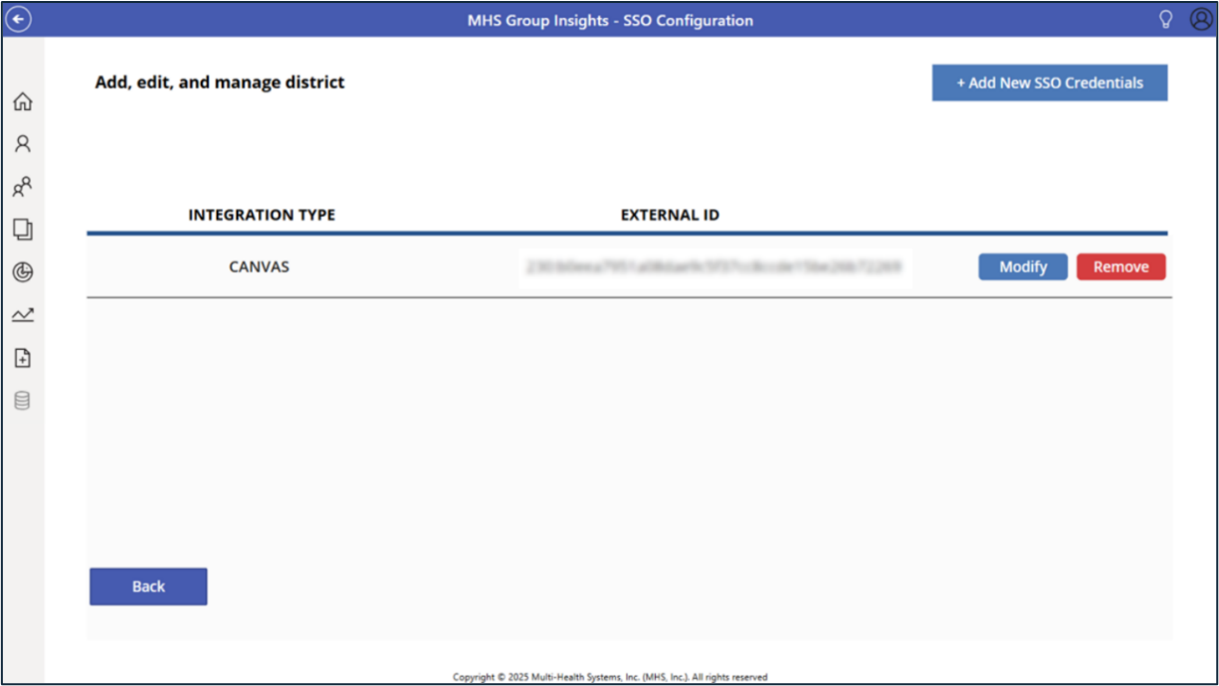
- Add Canvas SSO Credentials
- In the next window, click Add New SSO Credentials.

- Select Canvas as the Integration Type.
- Paste the Deployment ID you copied in Step 5 into the External ID field.
- Click Save to complete the setup.
- In the next window, click Add New SSO Credentials.
- Final Verification
- Return to the Canvas Portal.
- Your new SSO application should now be active and ready for student access.
Important: For students to successfully access their test through SSO, student emails must be included during rostering and a Test Plan must be created.
If either is missing, students will receive an error when attempting to log in.
Troubleshooting
If you run into any issues during setup, double-check the following:
- The JSON URL was entered correctly during developer key creation.
- The Client ID and Deployment ID were copied accurately.
- Canvas credentials were entered properly in the MGI application.
- App installation and activation were successfully completed in Canvas.
If you are experiencing problems, please contact the Implementation Team at [email protected]