TOPICS
How to add an individual user
After MHS creates your account, you can sign into the app and create new accounts for other users. To do
this:
- Click the Manage Users icon in the left navigation menu.
- Click the Add User icon above the right-side of the table. This will take you to the User
Profile screen.
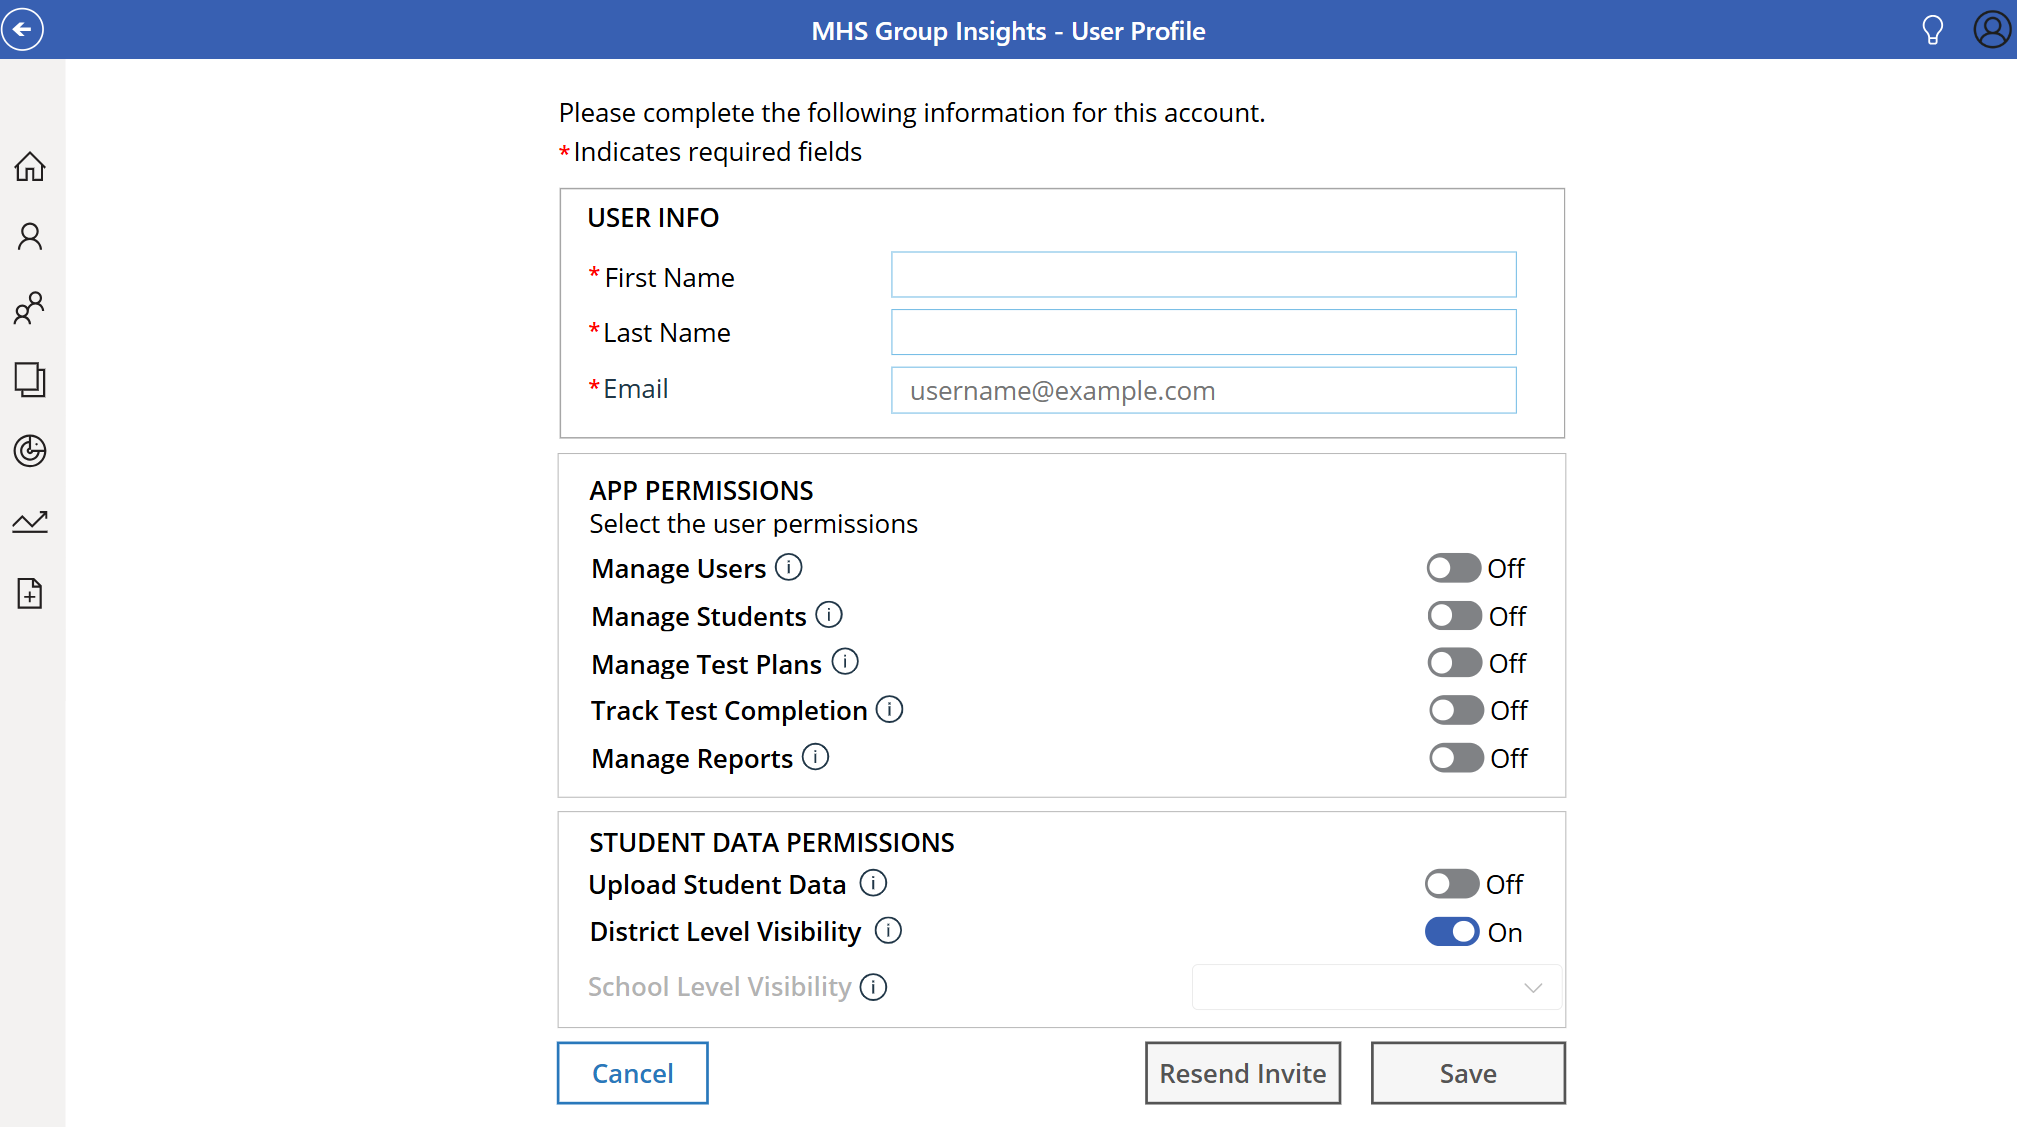
- Enter the user’s first name, last name, and e-mail address into the applicable fields.
- Set the app permissions for the user by turning the toggle for each permission on or off. (Note: App permissions can only be toggled on for users with an Administration role.)
There are 5 screens in the app that the user can see based on their permission level: Manage Users, Manage Students, Manage Test Plans, Track Test Completion, and Manage Reports. To learn more about each permission level, hover over the “i” icon beside the permission name. (See App Permissions below for more information.)
- Set the student data permissions. These permissions refer to the student access that the user has within the district. To learn more about each permission level, hover over the “i” icon beside the permission name. (See Student Data Permissions below for more information.)
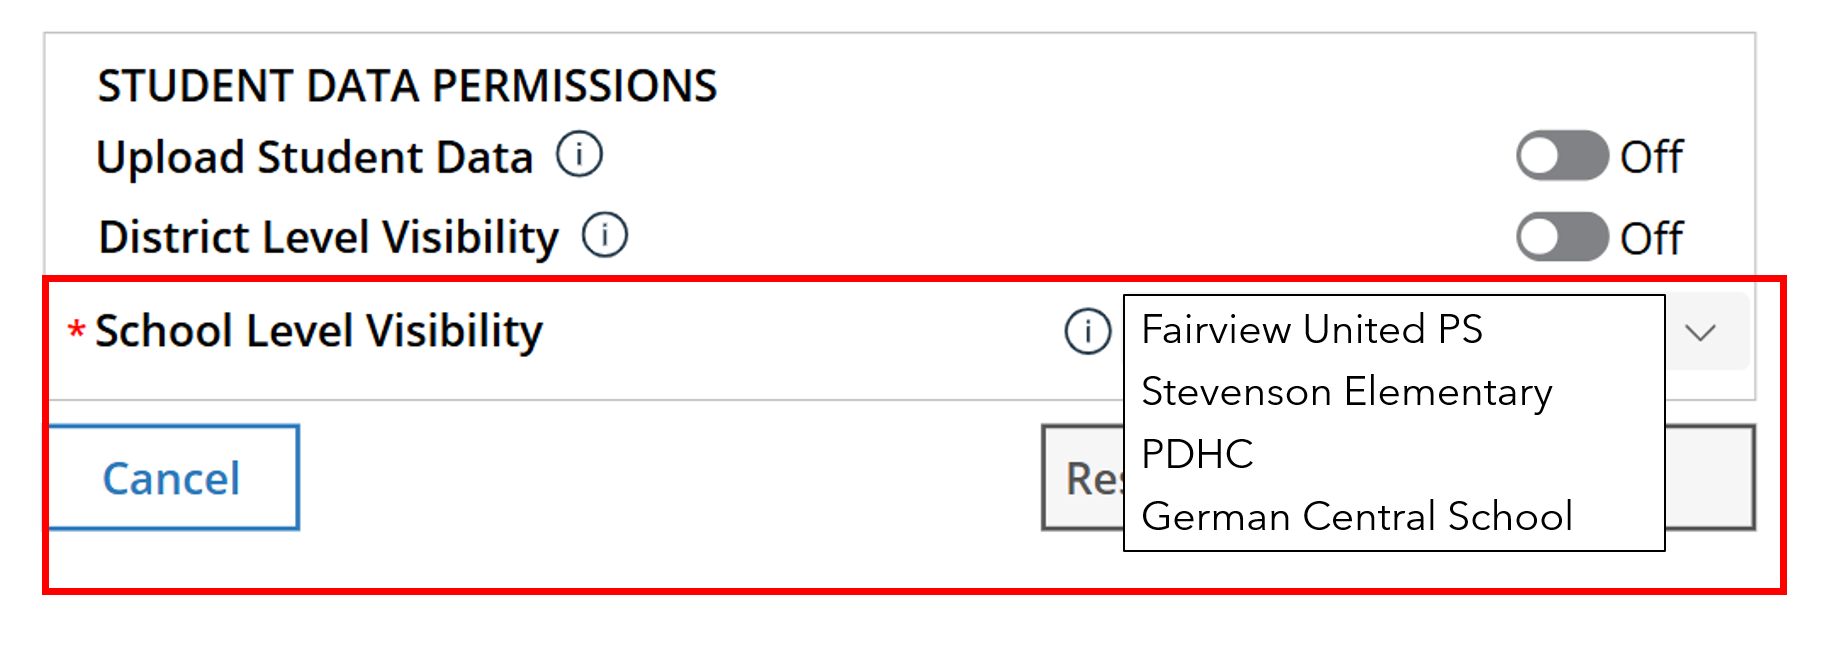
The default is for the District Level Visibility option to be turned On. This means that the user will see all of the student data within their district. If you want the user to only see student data for a specific school:
- Set the District Level Visibility to Off by clicking the toggle switch. This enables the School Level Visibility option.
- Select a specific school for the user from the dropdown menu.
- Click the Save button. You will see a notification that the user has been created successfully.
When you click Save, the user will receive an invitation email with instructions on how to access the app.
You will now be able to see the users you have created in the Users table.
How to activate an imported user
When you upload data from your district’s School Information System, the imported faculty do not automatically gain access to the MGI app. This is because many of the individuals that were imported are teachers and other personnel who will not be using the MGI.
However, on occasion, these individuals might assume a new role (such as a coordinator) and need access to the app so they can create test plans and generate reports. In these situations, you can give them access by following these steps:
- Click the Manage Users icon in the left navigation menu.
You will see a list of all of your existing users.
- Click the right arrow [>] beside the imported individual you want to give access to.
This will open the user’s profile.
- Under App Permissions, select the permissions you want the user to have by toggling the applicable switch to the On position. (Note: App permissions can only be toggled on for users with the Administration role.)
There are 5 screens in the app that the user can see based on their permission level: Manage Users, Manage Students, Manage Test Plans, Track Test Completion, and Manage Reports. To learn more about each permission level, hover over the “i” icon beside the permission name. (See App Permissions for more information.)
- Set the student data permissions. These permissions refer to the student access that the user has within the district. To learn more about each permission level, hover over the “i” icon beside the permission name. (See Student Data Permissions for more information.)
The default is for the District Level Visibility option to be turned On. This means that the user will see all of the student data within their district. If you want the user to only see student data for a specific school:
- Set the District Level Visibility to Off by clicking the toggle switch. This enables the School Level Visibility option.
- Select a specific school for the user from the dropdown menu.
- Click Activate Access.
- Click Save.
The imported user will now have access to the MGI app.
Terms and Permissions
App Permissions
Manage Users
This permission allows the user to click the Manage Users icon in the menu and access the Manage Users screen, where they can add, edit, and manage user accounts.
Manage Students
This permission allows the user to click the Manage Students icon in the menu and access the Manage Students screen, where they can add, edit, and manage student records.
Manage Test Plans
This permission allows the user to click the Manage Test Plans icon in the menu and access the Manage Test Plans screen, where they can create and download test plans.
Track Test Completion
This permission allows the user to click the Track Test Completion icon in the menu and access the Track Test Completion screen, where they can track completed tests.
Manage Reports
This permission allows the user to click the Manage Reports icon in the menu and access the Manage Reports screen, where they can view and generate reports.
Student Data Permissions
Upload Student Data
This permission allows the user to add student records to the MGI.
District Level Visibility
This permission gives the user access to all student data in their district. Note that District Level Visibility is the default setting.
School Level Visibility
This permission gives the user access to student data from only one selected school. Note that this option is turned off by default. To enable this option, turn the District Level Visibility setting to Off.
Anyone who is involved with implementing Gifted Testing should be a user. That includes anyone who has a responsibility of adding users or students, track test completion, creating test plans, and generating reports.
The number of users depends on the number of licenses that you or your administrator have been provided with. For more information, please contact MHS Customer Service at [email protected]
Only administrator role-based accounts have access to the app. An administrator level account can also have the role of Proctor and/or Teacher.
Click the Manage Users icon from the left navigation menu. You will see a list of all of your existing users. Click the right arrow [>] beside the user you want to edit. Click Resend Email. You will see a notification indicating the email invitation was sent successfully.
Currently, a user can either see data for an entire district or data for one school within that district. There is no option to view data from more than one school without giving the user access to the entire district.
This option is different from managing students, as it only allows the user to add student records to the MGI. In some cases, you might enable this permission for a user–such as an IT employee–and turn other permissions off, if all you want that user to do is upload data.
If you no longer want a user to have access to the MGI, click the Manage Users icon in the left menu, click the right arrow beside the user’s name, turn all of their permissions to Off by clicking the toggle switch, and then click Save.
If you want to permanently remove a user’s account from the MGI, you must reach out to Customer Service ([email protected]) at Multi-Health systems.