TOPICS

▶
How to add and edit clients
You add and edit your clients on the My Clients page.
Note: If you are an administrator (i.e., a clinician with the ability to create sub-users), the My Clients page also gives you the ability to transfer clients between sub-users.
To add a client
Before you can assess a client, you need to add them into the system on the My Clients Page.
- Click My Clients in the left menu.
The My Clients page appears.
- Click ADD NEW CLIENT at the top of the page.
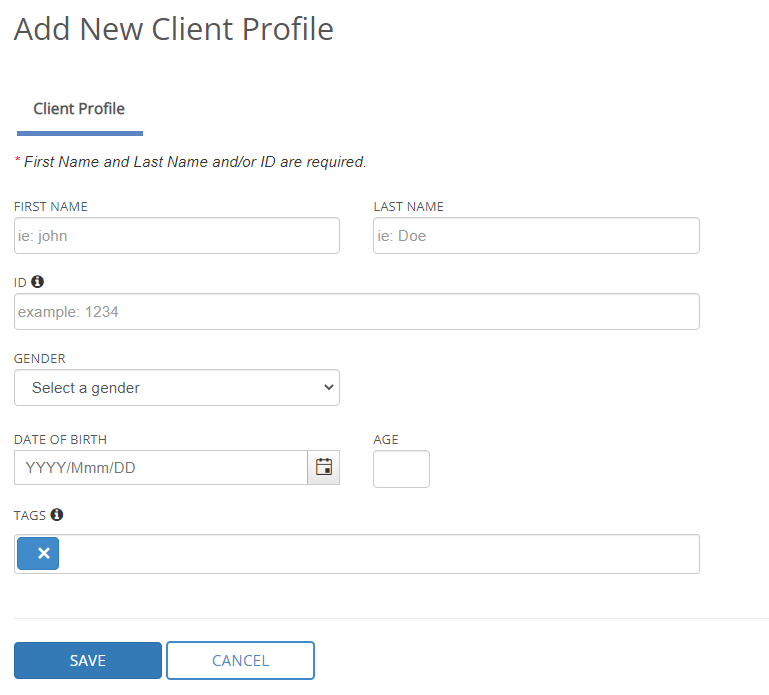
A new window called the “Client Profile” opens.

- Enter the client details into the applicable boxes.
- To organize clients, use the TAGS feature. For example, you can enter the name of the school or grade level into the TAGS box. Press enter and it creates a tag.
- Click SAVE when finished.
The client has now been added to the table. Note that when you click SAVE, a new tab appears called Diagnoses and Medications.
To edit a client
- Click My Clients in the left menu.
The My Clients page appears.
- Double-click the name of the client you want to edit.
The Client Profile window opens.
- Make your changes to the client’s profile.
- When you are finished, click Save.
The client management feature lets you transfer clients between clinicians. This could be useful when a clinician is out sick, on maternity leave, or otherwise not available. Note that the ability to transfer clients is only available to account administrators (i.e., those clinicians who have the ability to create sub-user accounts).